
Comic Process (Pt. 2 of 2)
This is the second part of a short series detailing my current comic making process, this one covering color.

This is the second part of a short series detailing my current comic making process, this one covering color.
At the end of part one, I had a fully inked page. I go through all the pages in a chapter in batches; first it's the layout and sketch, then I complete the inks for all the pages, and then I get to the color more slowly. This is the part that takes me the longest, which is probably in no small part because I've had the least practice at it. I'm still figuring things out.
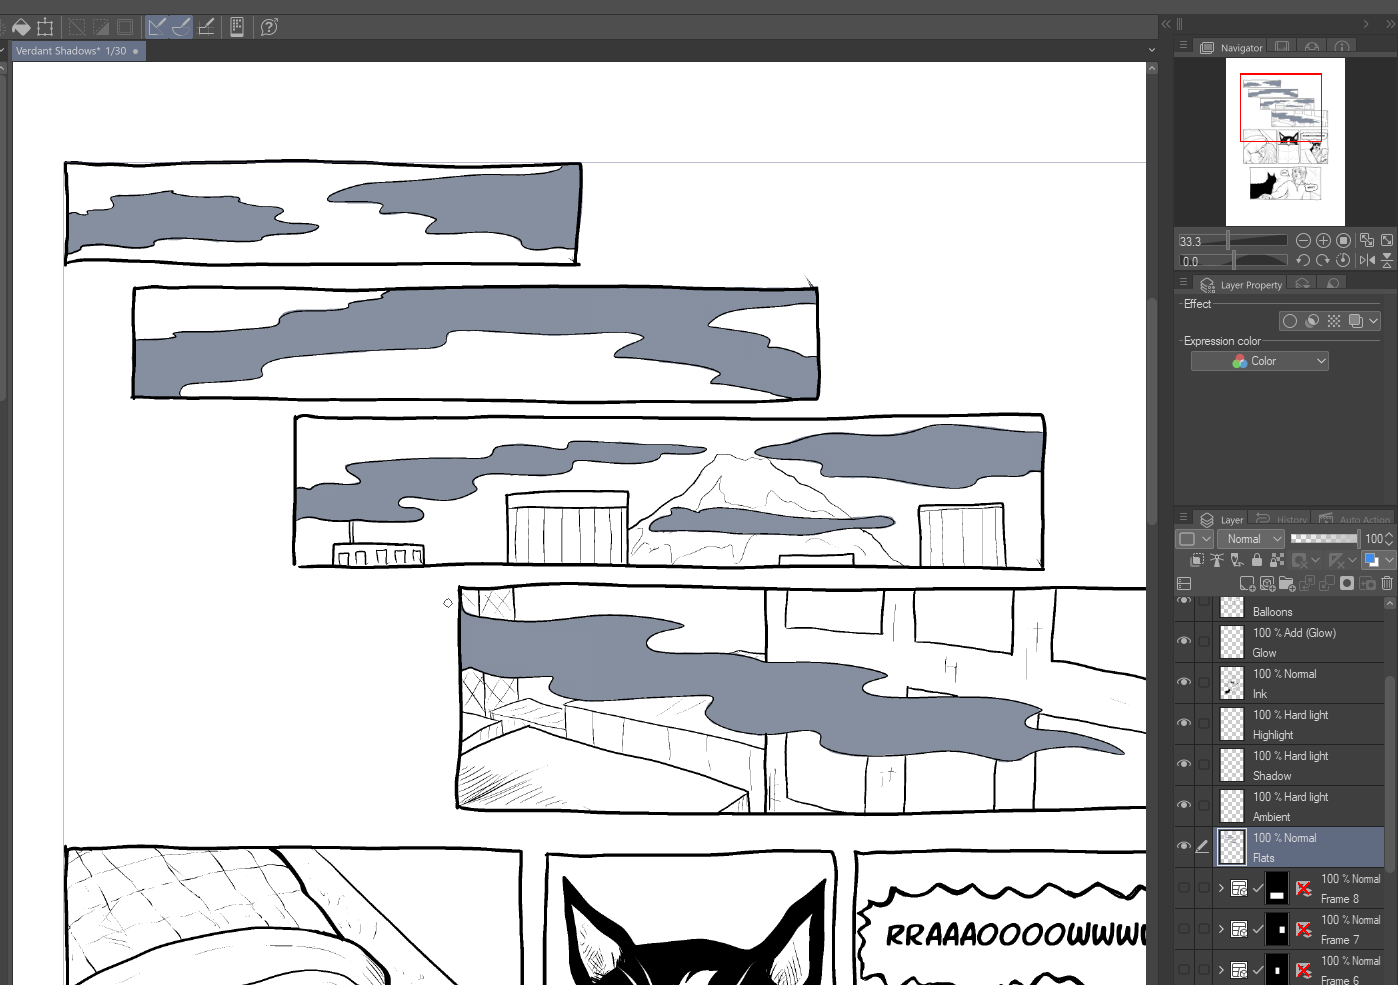
I start by getting all the flat colors in. To get this done I use the lasso tool to select everything that will be a certain color and then flood fill it, with the tool set non-contiguous.
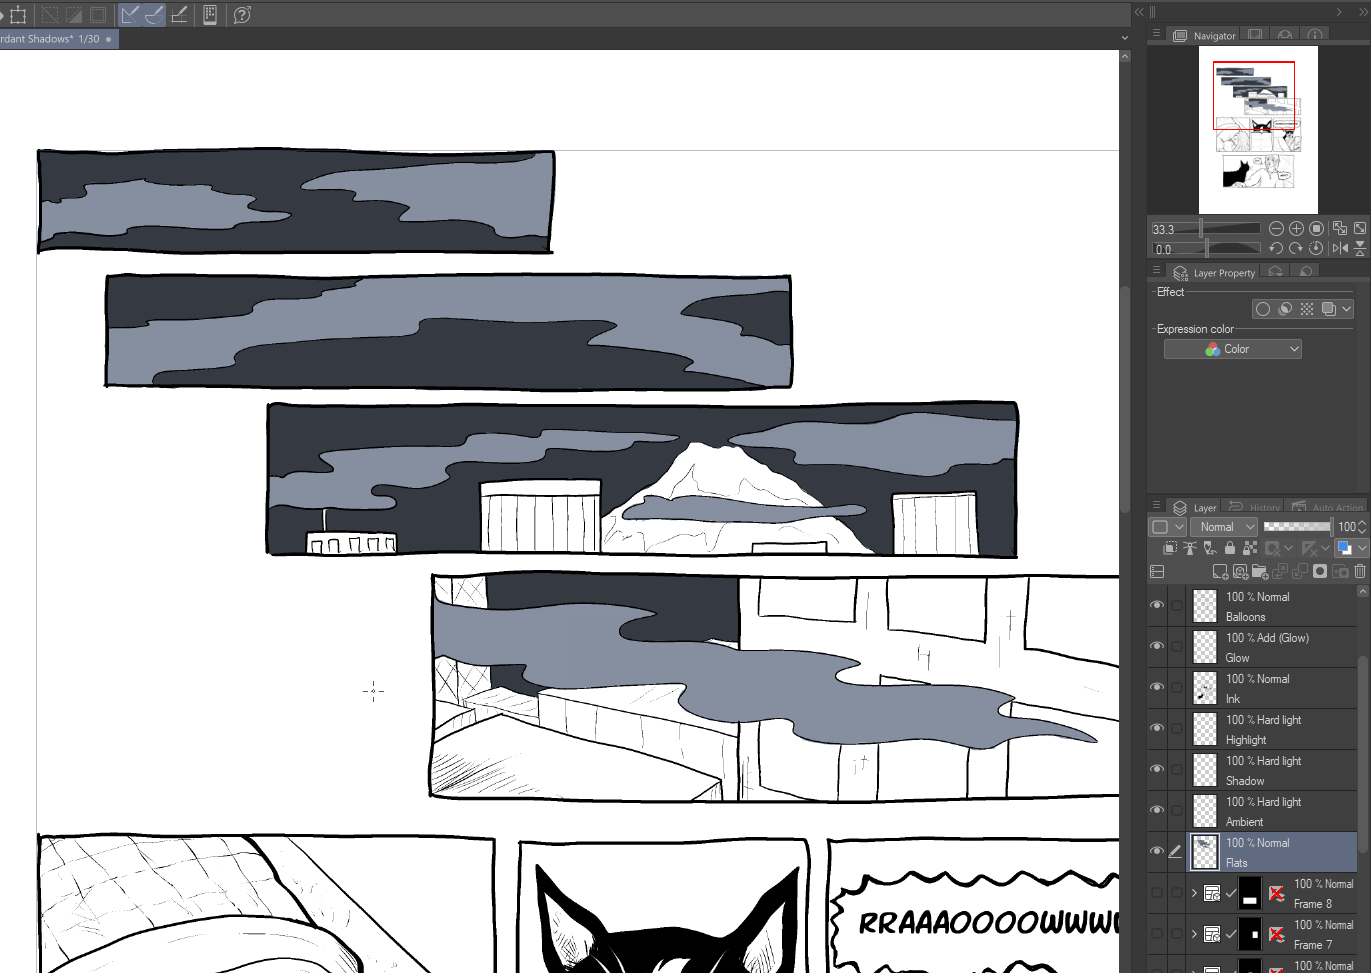
That means I can get progressively sloppier with my selections, which is handy. As of this chapter I'm doing everything all on one set of layers, not in each panel (you can see that I started with the separate panel layers on the right, but I decided not to use them), so I can get everything done all at once instead of doing all the flats for one panel and then the next. Much faster.
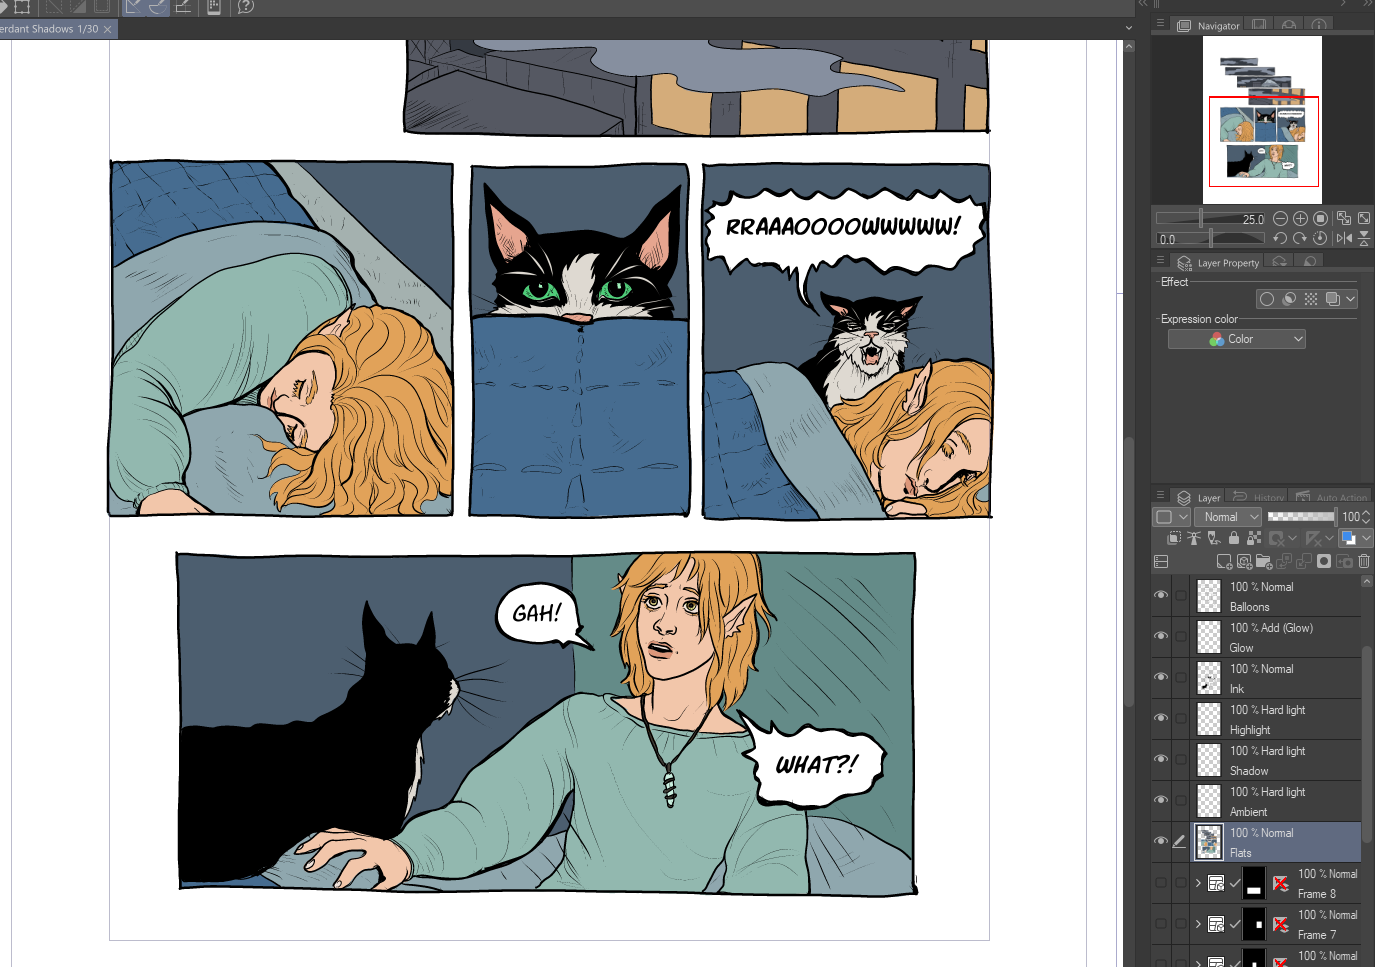
After I have all the flat colors done, I set that layer to be the one that selections are taken from so that I can select areas of color when I'm doing the other things.
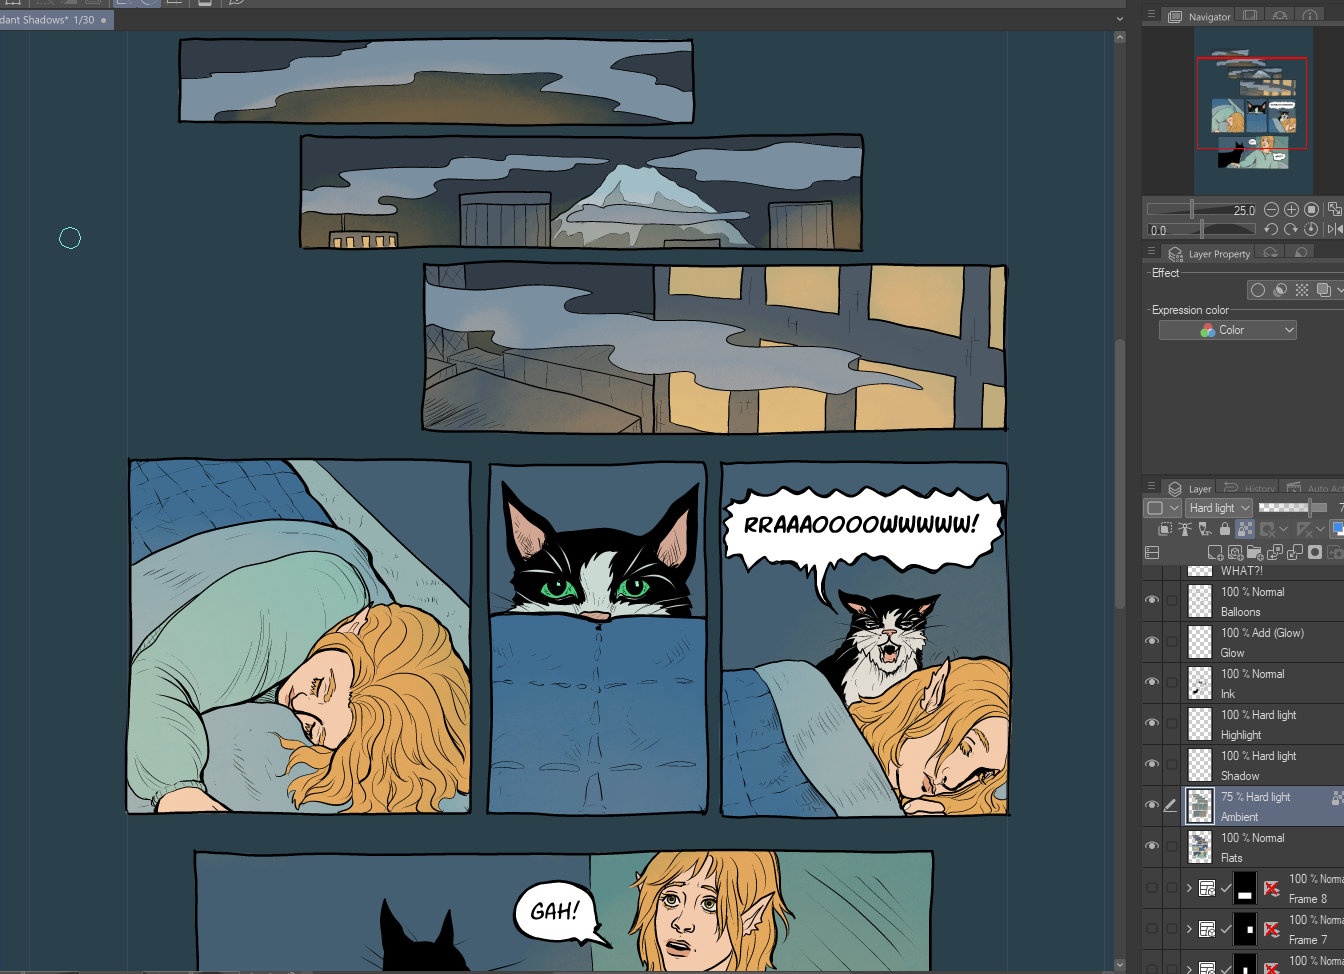
The next thing I do is select all the panels and apply a unifying color (the 'Ambient' layer), which light sources get added into. I've started setting it to 75% opacity at the end so it isn't so overpowering. At this point I also turn the background layer on, so I can see what effect the background color of the page is having. (I went to a lighter color for this chapter so that the blacks can stand out more.)
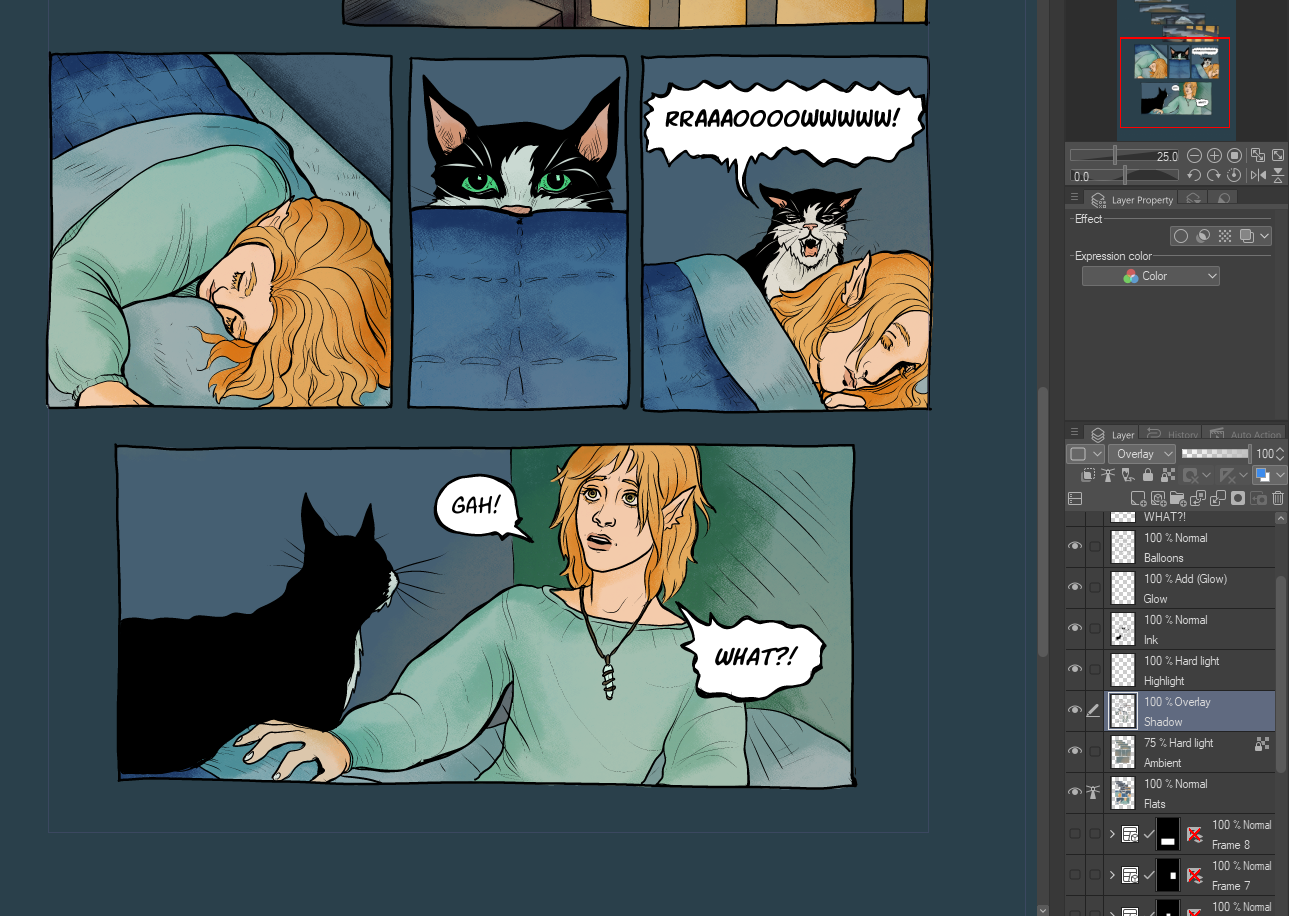
Then I start doing the shadows. I used 'hard light' for the layer type throughout chapter one, but I've decided to go for 'overlay' for this chapter. This is where I do broad shadow strokes, including in the background.
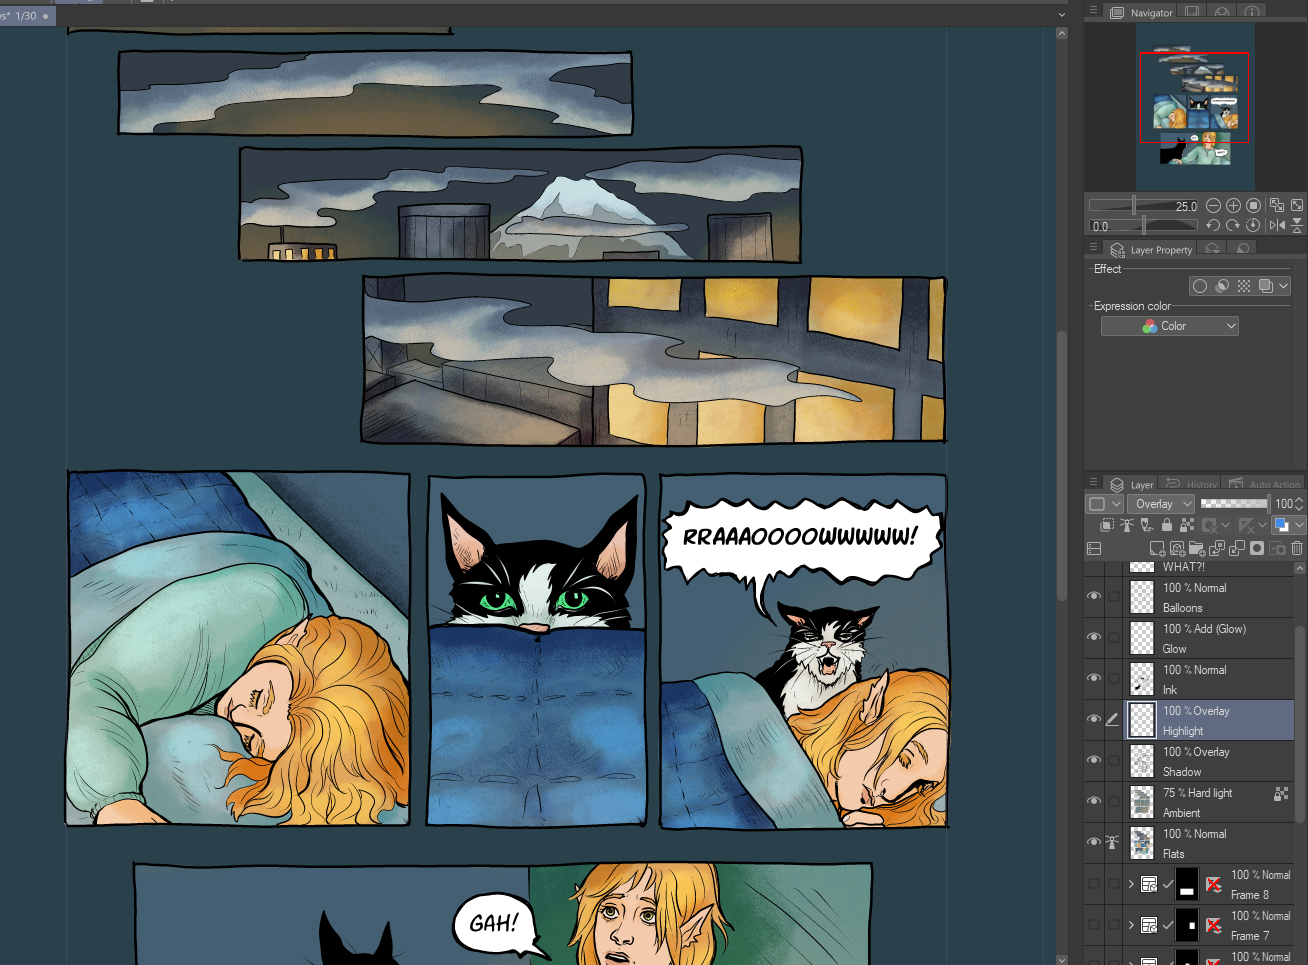
After that I move on to the highlights, which is really very much the same as the shadows, but opposite. Broad strokes. Some things that should be shinier get brighter highlights, but those will mostly also end up getting some emphasis in the glow layer later. I've also switched from 'hard light' to 'overlay' for this step.
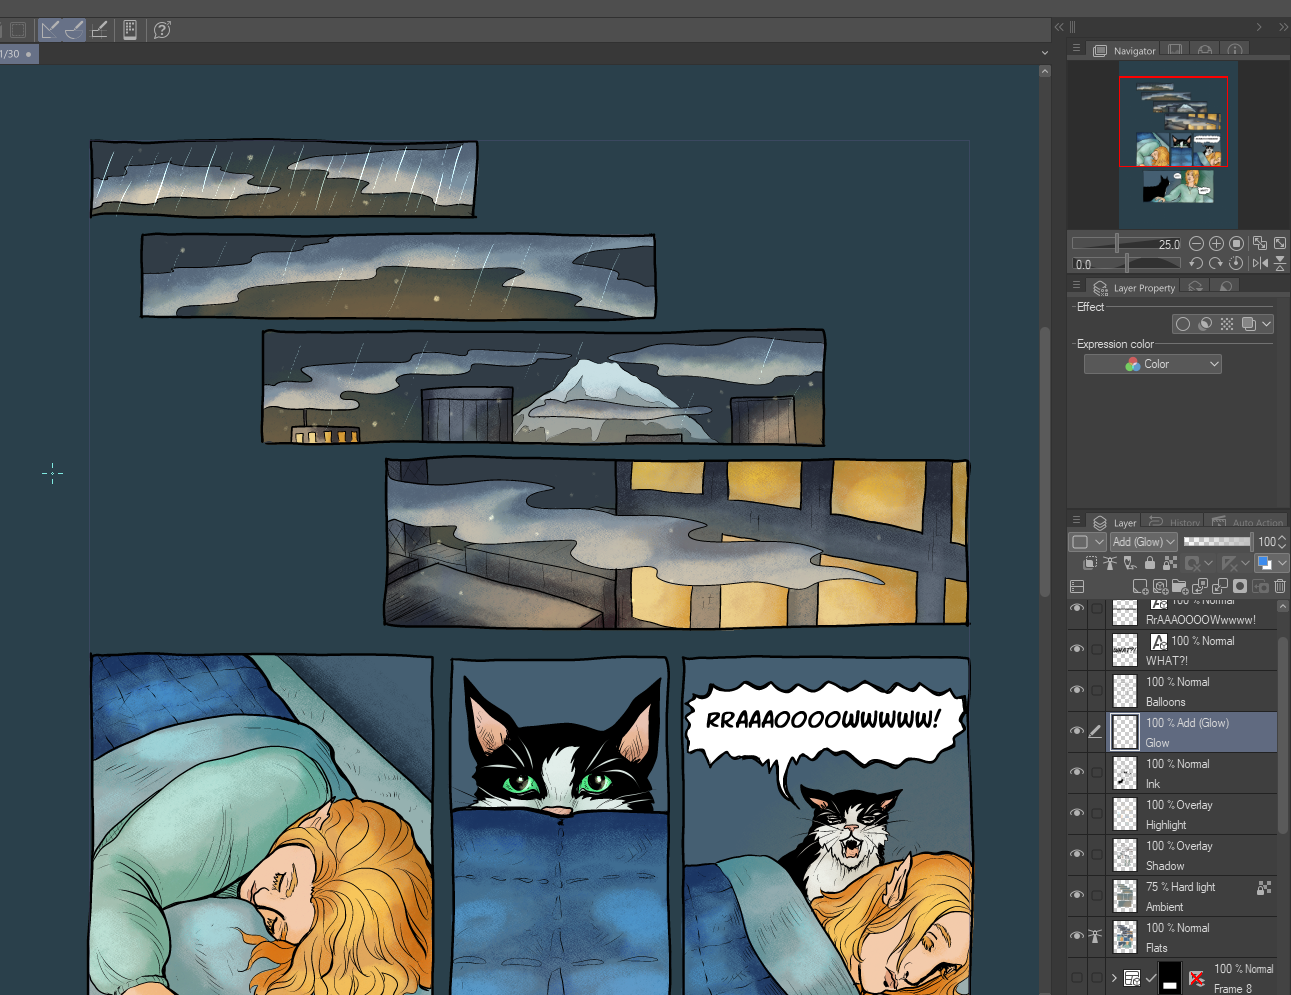
Then it's time for the glow layer! There isn't a whole lot that's glowy on this page, just some ambient magic effects and rain in the top panel. Sometimes there's a lot more, like scenes where people are actively using magic, or when the Beacons are present. I use the same dry gauche brush as I use for the shadows and highlights for the general glowiness, but go back to the nib brush for things like the rain.
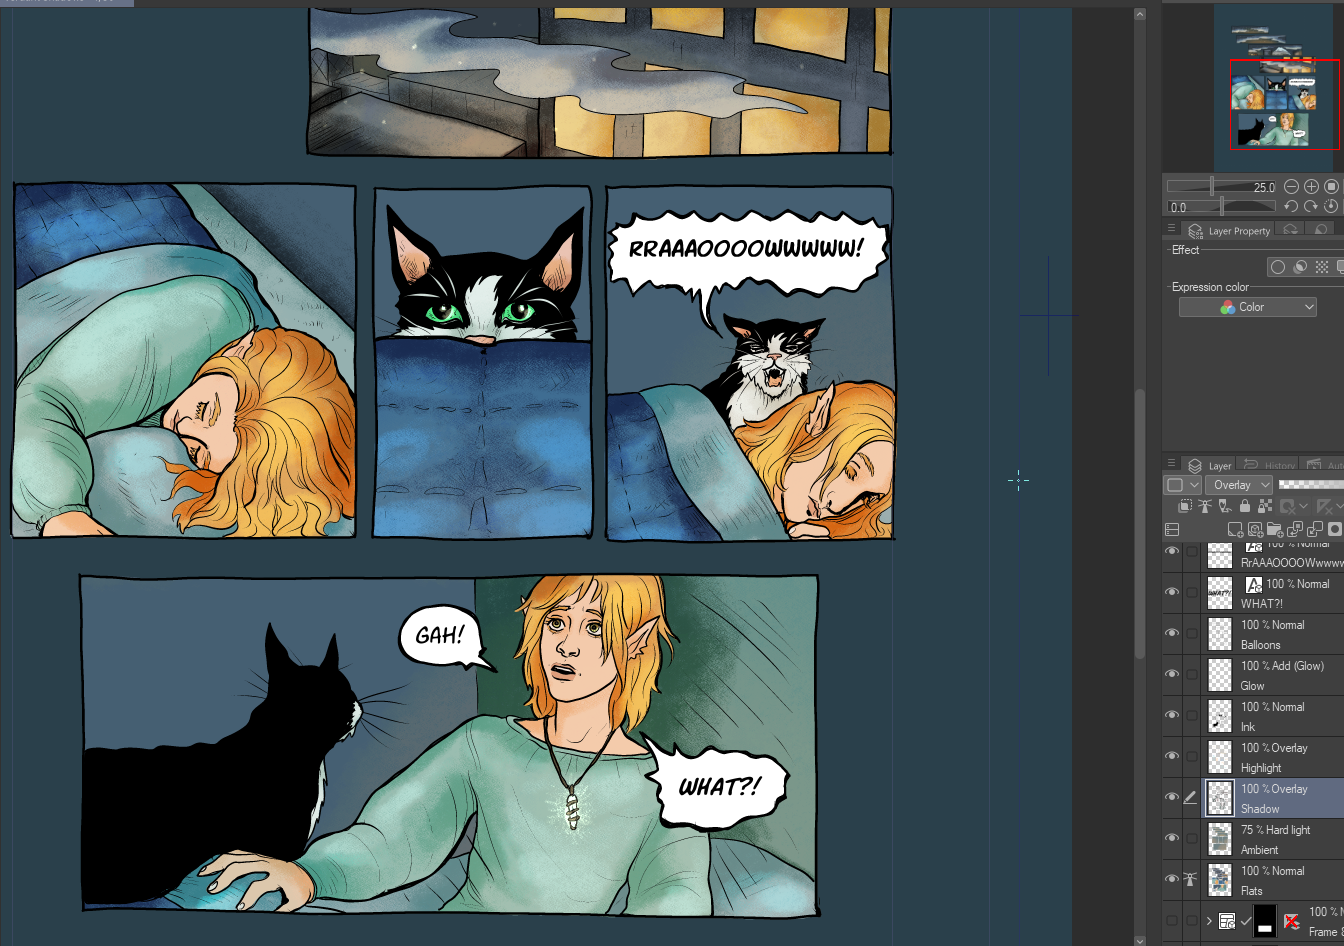
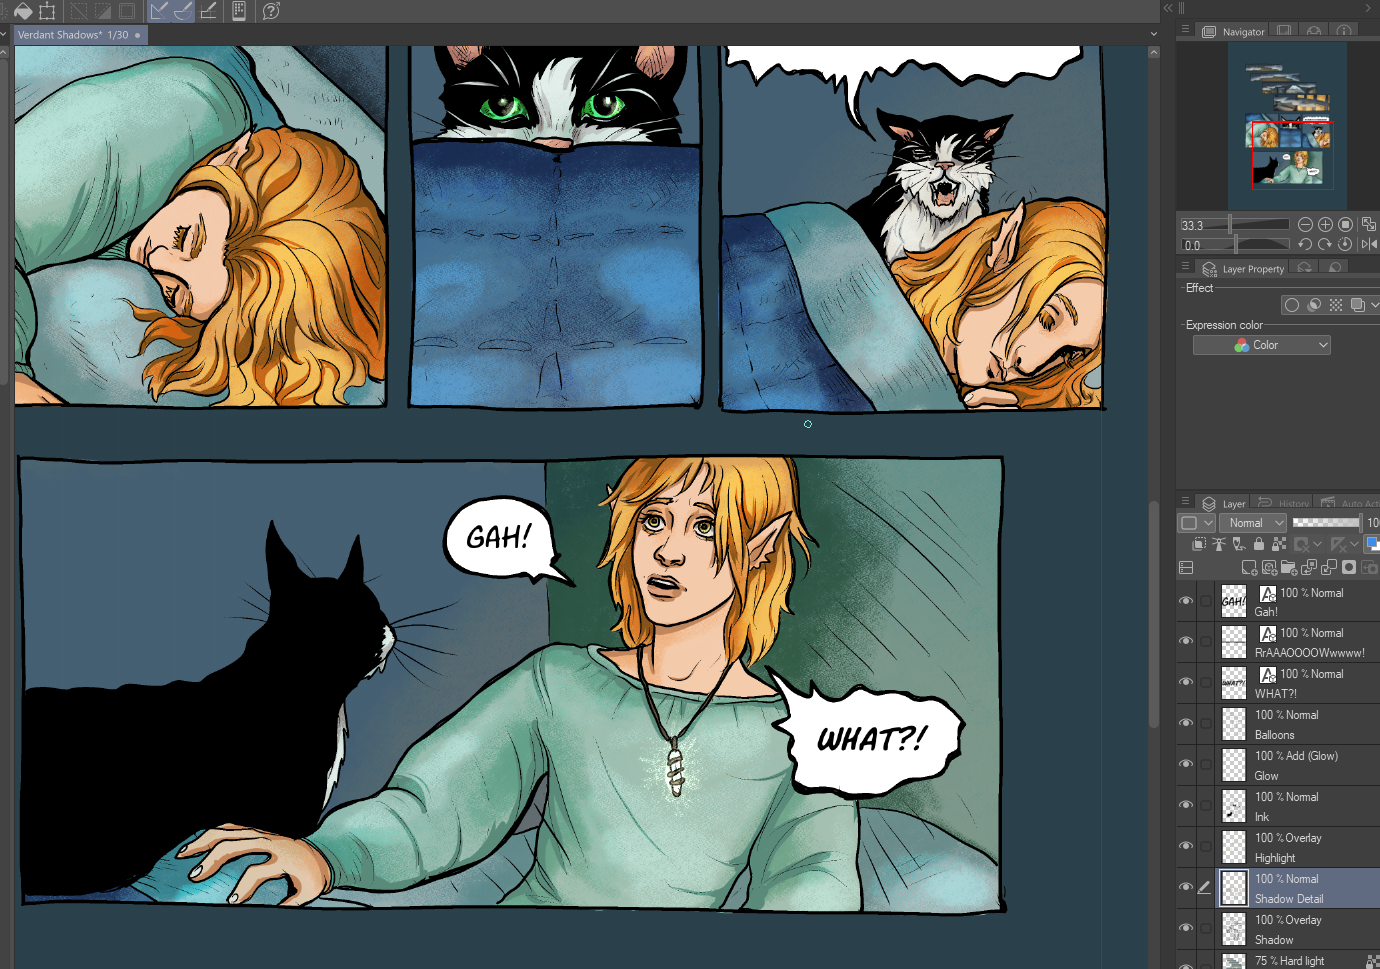
After the glow is done (and here you see Rowan's pendant, which is the final glowy bit on this page), I adjust the shadow and highlight layers until they're working. And then it's on to the new step that I've just started doing for this chapter, but I think helps a lot:
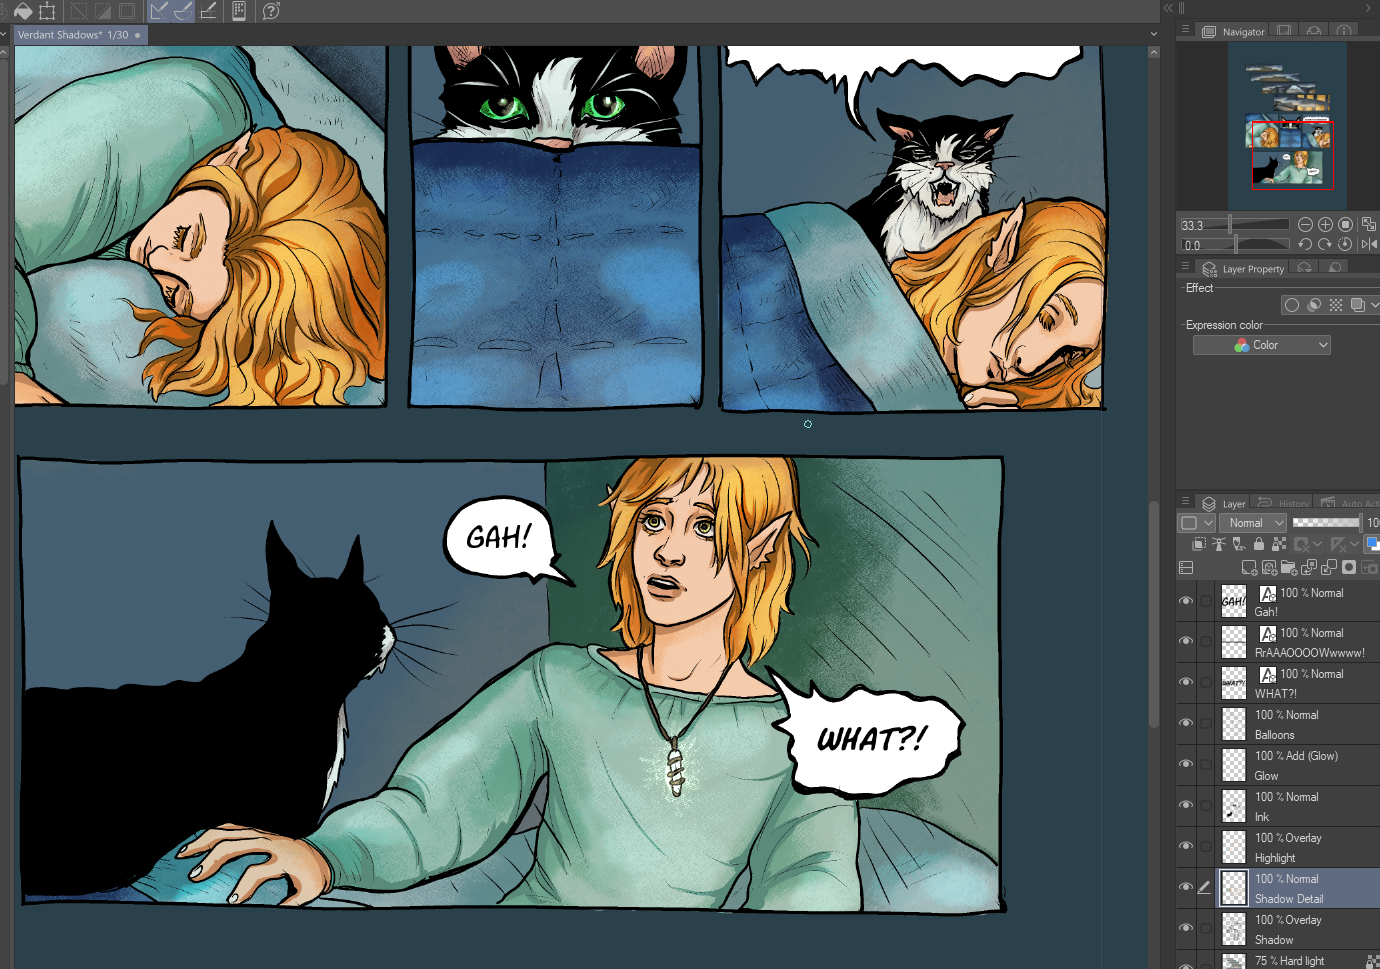
I've added a normal layer for detailed layers above the general shadow layer and below the highlight layer, which gives them some variation. I use the turnip pen tool for this, and I'm only going over focus points: characters, potentially some important objects (although not in this page).
And that's the final coloring step, so as long as I'm happy with it, I export the page and then downsize it for web (800px wide is what I'm going with here).